Tank Bridge of the Royal Engineers in World War II

An unsuccessful raid by British and Canadian forces on Dieppe in 1942 confirmed that demolition and obstacle clearance engineering would be required for any large-scale invasion of continental Europe. But they will have to be carried out “under armor”. Therefore, military engineers began work on new engineering vehicles with even greater enthusiasm.
By the summer of 1944, the result of this work was the birth of three main assault bridges and a vehicle called the ARK, which were then used during the Normandy landings. Here, the main task of the bridges was to organize crossings over such obstacles as narrow rivers, swampy areas, ditches, canals, concrete walls (scarps), etc.
And now directly about the bridges.
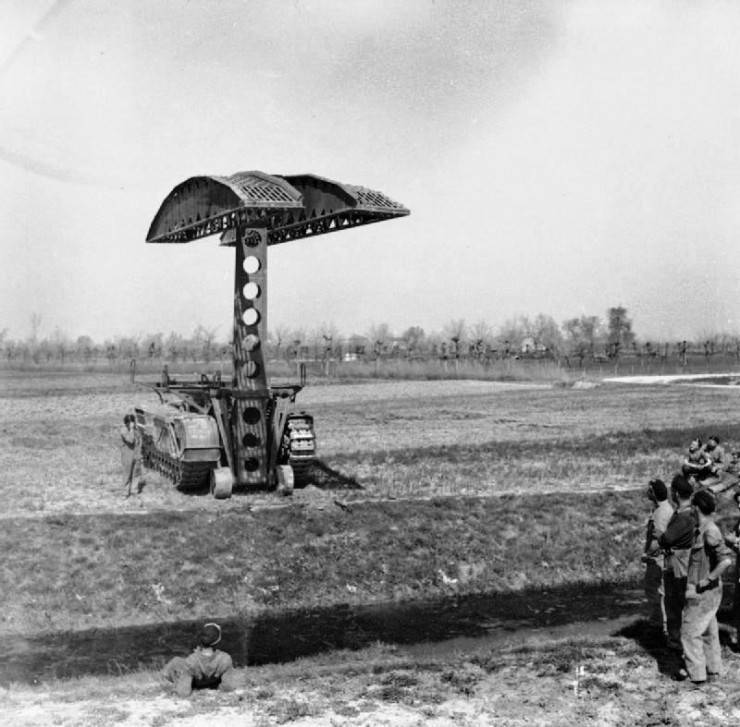
Scissor bridge 30 feet
Bridge No. 1 was a direct descendant of the earlier Scissor Assault Bridge and was designed to carry heavier loads (up to 20 tons) over obstacles 30 feet (9 m) wide.
Early prototypes used the Cruiser Tank Mark II (A10) but was soon replaced by the new Cruiser Tank Mark V or Covenanter.
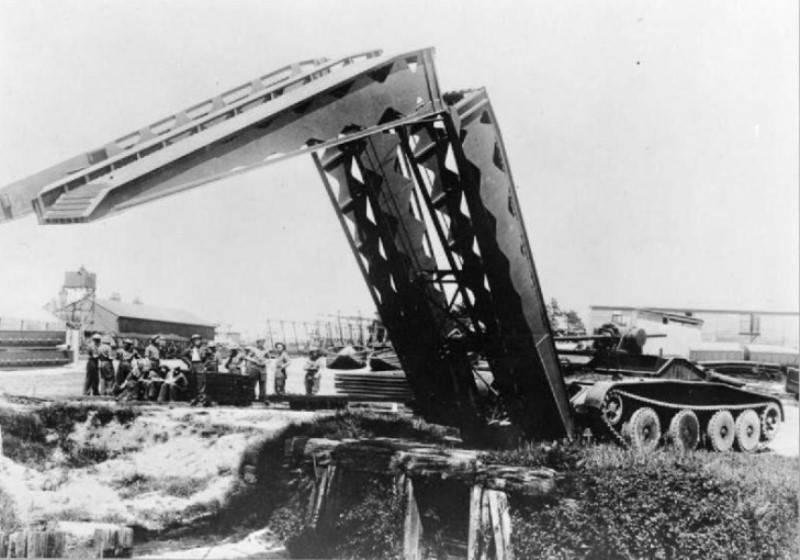
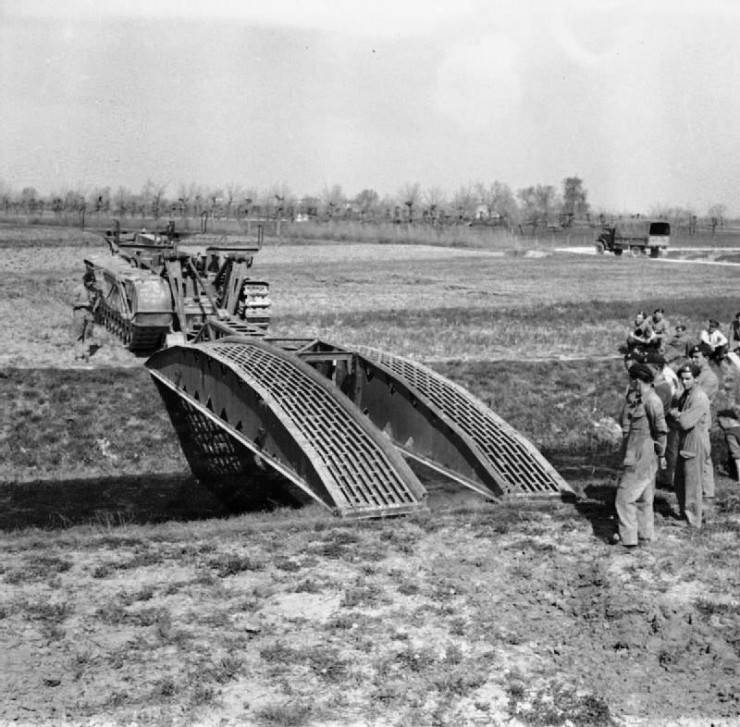
Scissor bridge 30 feet stacked over an obstacle
Subsequent tests showed that the bridge was capable of carrying loads of class 30 (up to 25 tons), but the Covenanter had an unsuccessful design and was therefore replaced by the more successful Infantry Tank Mark III or Valentine.
A scissor bridge on the Valentine tank. AFV Proving Ground at Chobham, Surrey, September 28, 1943
Valentine "with bridge number 1 was used in Italy, North-Western Europe and Burma.
There is information that several of these bridges were sent to the USSR under Lend-Lease. However, there is no specific data on this, although one copy of "Valentine" with a scissor bridge is in the museum in Kubinka.
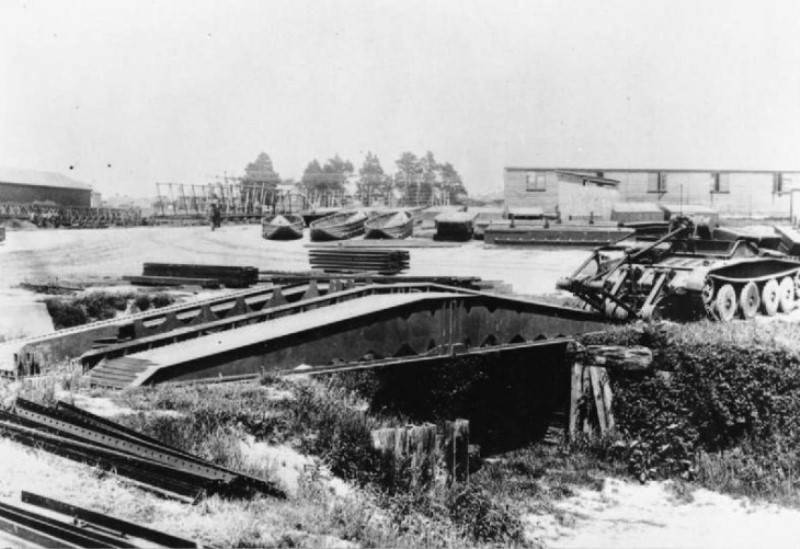
Tank bridge 30 feet
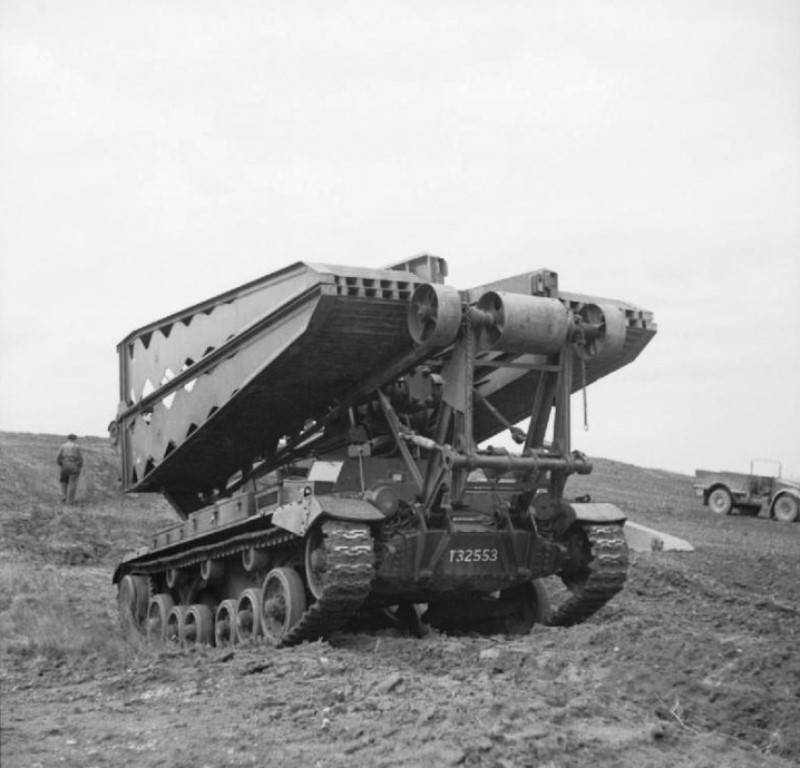
The Mark IV infantry tank, better known as the Churchill tank, posed a problem for Bridge No. 1. It was too heavy at 40 tons. Therefore, in 1942 a new bridge was designed.
Bridge # 2 was still supposed to span 30 feet, but instead of class 30, it was capable of handling class 60 tracked vehicles (up to 55 tons) and class 40 wheeled vehicles (up to 42 tons).
"Churchill" with bridge number 2
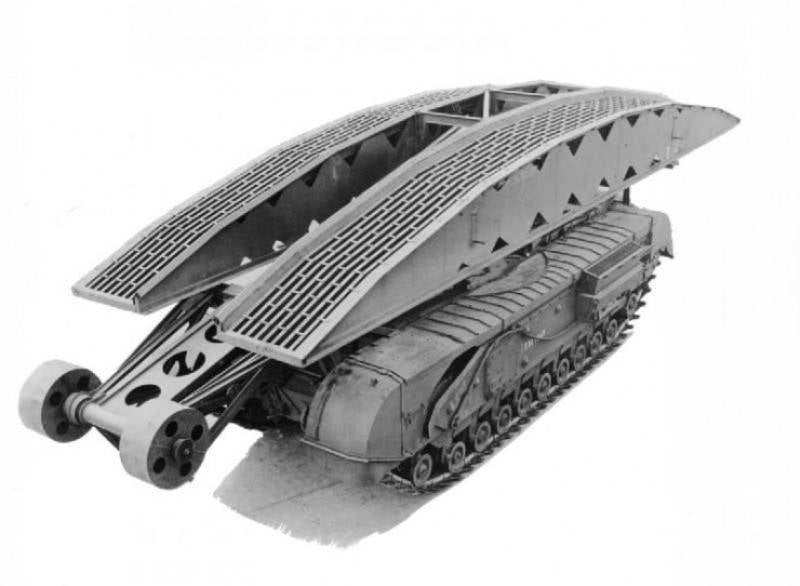
Due to the peculiarity of its design, the carrying capacity of bridge No. 1 could not be improved, so a completely new approach was required.
And a solution was found: two arched steel tracks were connected by multiple cross-braces and triggered by a hydraulic mechanism that kept the bridge in a horizontal position throughout the entire lifting and lowering process.
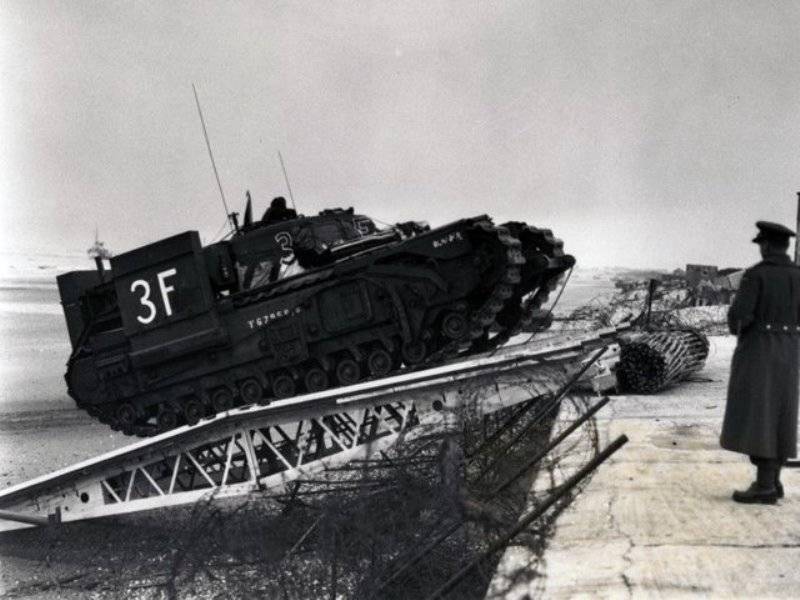
The Churchill bridgelayer with Bridge No. 2 during a demonstration in the Mezzano area, March 30, 1945
The bridge was mounted on a modified Churchill tank and operated by a driver, the other crew member was the commander, the whole process of setting the bridge to an obstacle took less than 2 minutes.
Bridgelayers based on the Churchill tank served in Italy and North-Western Europe.
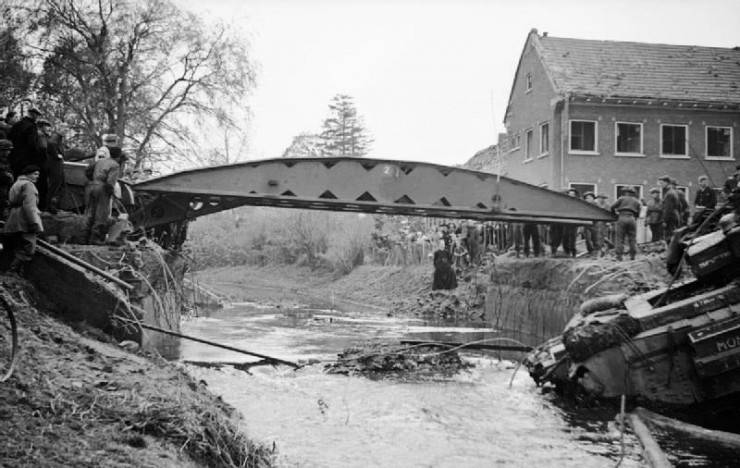
Bridge erected by Churchill across the river at Mergestel, October 26, 1944
Tank bridge with a small box beam
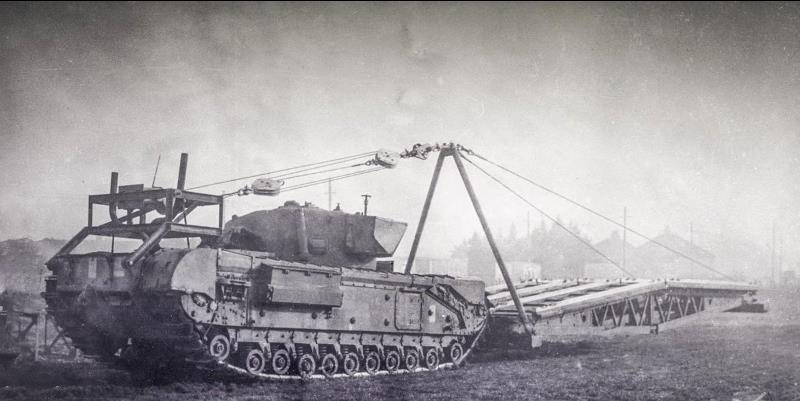
The last of the three tank bridges was named Tank Bridge Small Box Girder or SBG Assault Bridge. Designed specifically for D-Day and the 79th Armored Division, it was designed to withstand a Class 40 load (up to 36,6 tonnes) over a 30-foot (9 m) span, more specifically a 12-foot sea wall.
The bridge itself consisted of 4 sections connected together by cross beams to form a two-track crossing.
In mass production, the bridge was named the Churchill Armored Vehicle Royal Engineers (armored vehicle of the Royal Engineers) or "Churchill" AVRE.
A cable and a winch were attached to the engine deck, and an A-shaped frame was attached to the front of the tank. The bridge was suspended from the front of the tank at an angle of about 60 degrees.
At the same time, the weight of the bridge hanging from the bow compressed the front suspension bogies and lifted the rear bogies from the ground. Thus, steering the car when cornering was not easy.
The bridge was lowered onto the obstacle using a winch.
There were attempts to move the bridge in other ways. These included folding the bridge in half (like a scissor bridge) and towing the bridge after the tank, adding wheels to the bottom of the bridge.
The machine was not very popular with captains and helmsman landing ships, as the bridges "caught" the wind. Their presence in the front of the landing ships made it difficult to control the ship, so the bridges were often loaded as far as possible on the deck.
Churchill AVRE with small box-type girder bridge
Unlike bridges # 1 and # 2, the third bridge was carried by a standard armored vehicle (conventional tank), not a specialized bridge vehicle.
Thus, the vehicle could be used in other roles after the bridge was disconnected.
It should also be noted that sometimes the bridges were transported on a small trailer truck towed behind the tank and attached to the front of the tank just before use.
The sequence of actions of the bridge on the sea wall is shown below, including the use of fascina to soften the fall.
Assault vehicle "Churchill" AVRE in action. The photo shows that the tank did not hit the fascine and landed unsuccessfully.
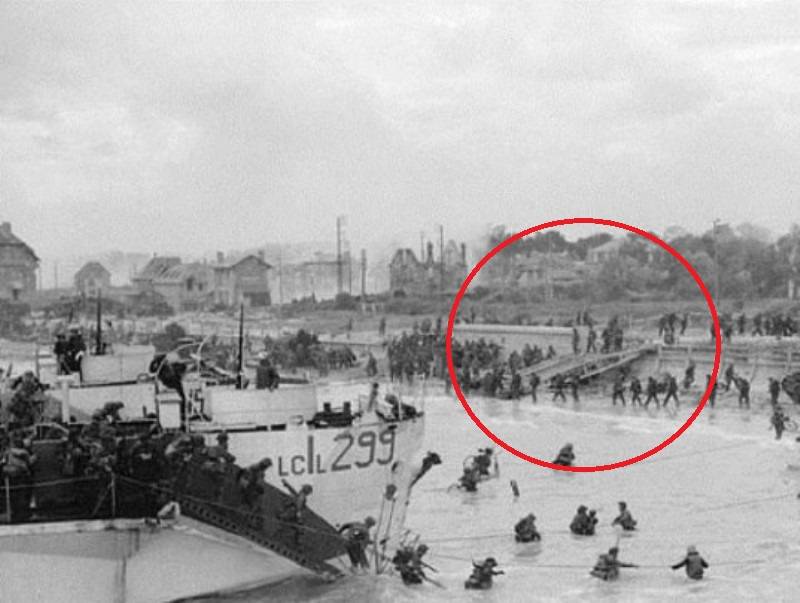
The photo below (in the red circle) shows the moment of practical use of the AVRE Churchill Bridge to overcome a vertical obstacle.
Regarding the landing operation in Normandy, I would like to note the following.
A month before D-Day, the Allies conducted six exercises under the collective title "Fabius Exercises."
The last of six exercises in May 1944 was an exercise called Force J. This final full-scale dress rehearsal for the Normandy landings was so extensive that the soldiers decided the night before they were actually heading for the French coast.
William Brooks, general secretary of the East Wittering Local History Group, describes the event as follows:
Cold drizzle and dim gray light greeted the dim silhouettes of battleships, cruisers, transports, and rocket ships sailing towards the shore. The overloaded men began scrambling over the nets into their swinging assault boats below. Periphery of their vision, the bay of the invasion was detailed, brightly lit by flares and flashes of all shades and surrounded by dense clouds of smoke.
They plunged into the water up to their chests, overcoming a maze of coastal steel and wood obstacles. On the heels of the advancing platoon of tanks, the soldiers of the North Shore Regiment (New Brunswick) rushed to their first goal: to build a local farmhouse. With sudden force, the front door to the property swung open, and behind it, to the bewilderment of the invaders, appeared Mr. Ray Balchin, owner of the Coolimores farm. Watching his favorite hedges being torn to pieces by the mechanized onslaught of wonderful machines, Mr. Balchin decided that he could no longer stand on the sidelines. A stream of profanity fell on the stunned soldiers like the notorious machine gun fire. After a few seconds of silent amazement, one infantryman replied: "Sir ... you are an Englishman!"
Yes, in fact, these were not the beaches of Normandy. It was Brackles in West Sussex. "
Trainings on using the AVRE Churchill Bridge before disembarking on the Normandy coast
Armored personnel carrier ARK
The need for new armored bridgelayers, as mentioned above, was more clearly defined after the unsuccessful amphibious assault at Dieppe.
This technique was supposed to help provide an offensive for tanks and other armored vehicles in difficult terrain. Soon, a number of new engineering armored vehicles were developed, including several variants of the Churchill ARK (Armored Ramp Carrier) bridge tank.
The ARK was used to overcome small obstacles and was a tank with the turret removed and the ramps mounted on the top of the superstructure and at both ends of the hull.
The vehicle was driven into an obstacle, ramps were turned, and other vehicles simply passed through it.
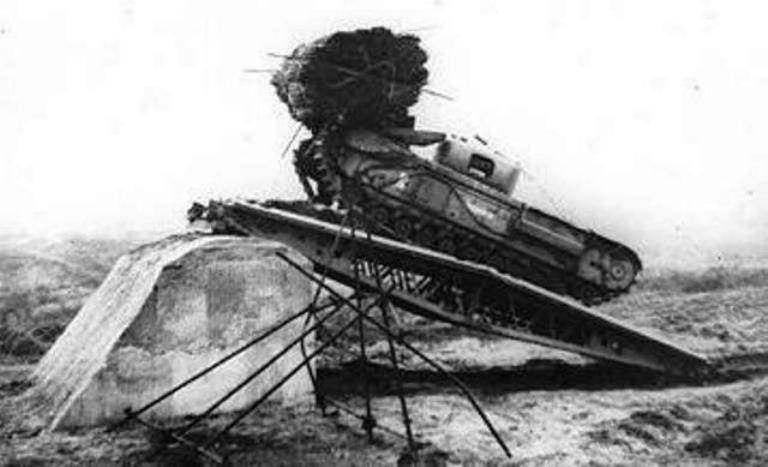
The ARK Mark I was used on the day of disembarkation mainly for penetration of sea walls and for protection. It had a 2 foot wide wooden walkway (deck) with short ramps. Opening the ramps, the car created a track bridge up to 10 m long and 3,3 m wide.
In February 1944, the serial production of bridgelayers began. In total, about 50 bridges were manufactured.
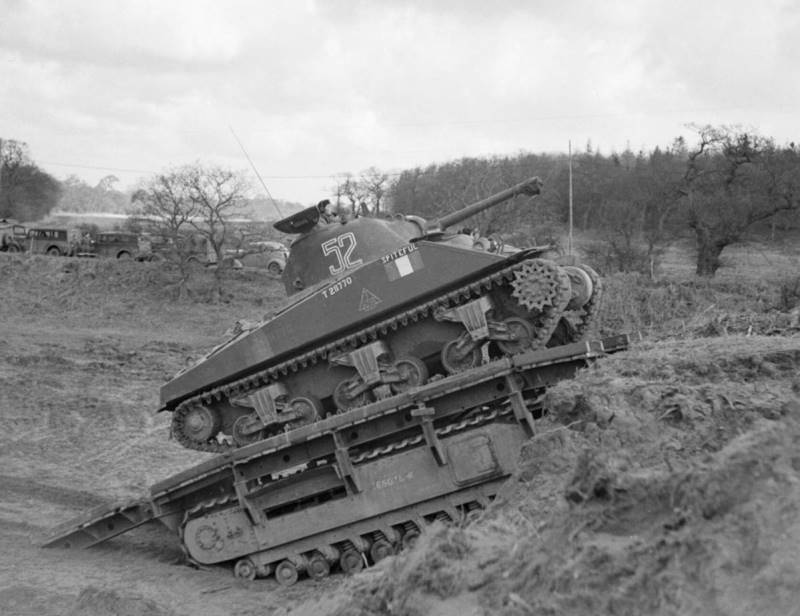
ARK Mk I helps the Sherman tank to climb the obstacle. Tests, February 13, 1944
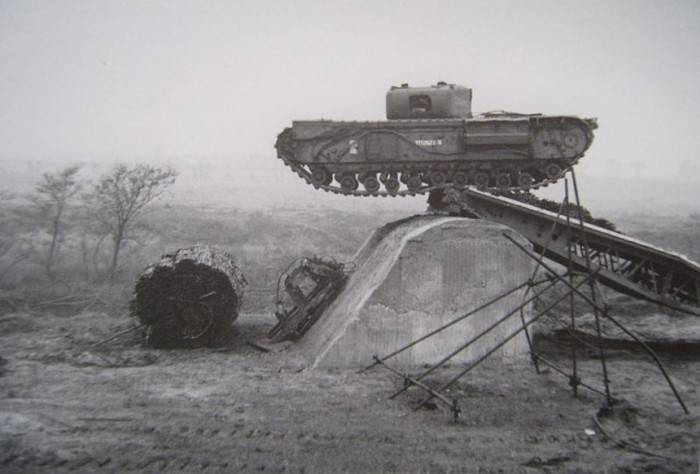
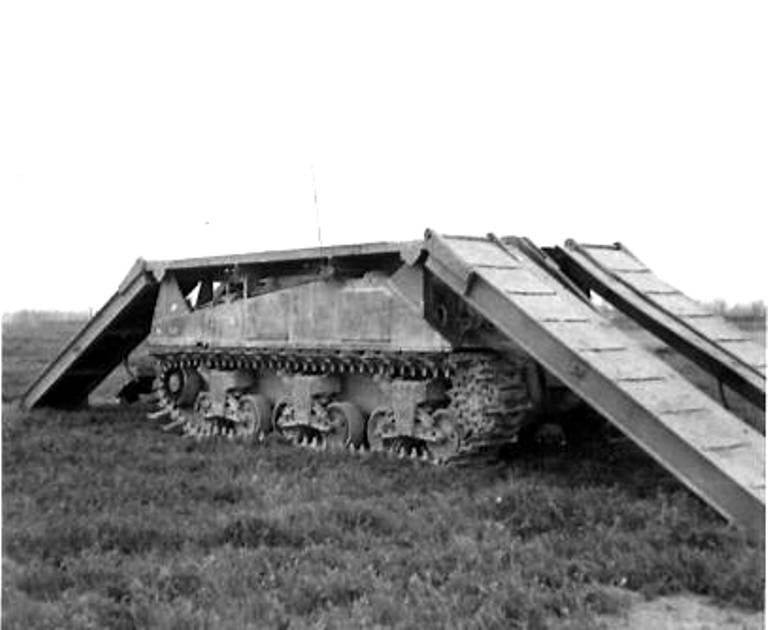
After the July 1944 battles in France, the Mk I model underwent significant modernization. The new version of the vehicle received the designation ARK Mk II.
ARK Mk II had a different section design. First of all, the length of the outer ramps was increased, as well as the width of the left ramps of the bridge was doubled (see photo below), which made it possible to cross the bridge not only for tanks, but also for cars with a smaller gauge.
The new machine made it possible to organize a crossing with a length of 12-15 m versus 10 m on the Mk I.
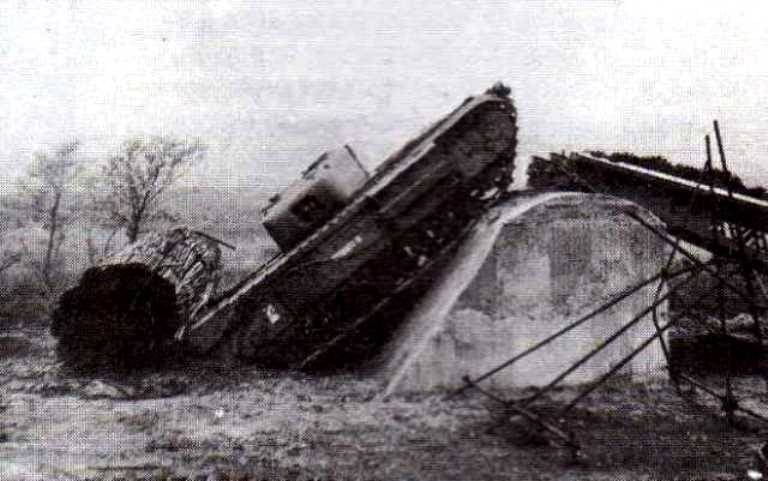
In the transport position, the ramps were raised up and attached at an angle to special masts with cables. To transfer the bridge into a combat position, the fastening locks on the cables were opened, and the ramps fell to the ground under their own weight. After completing the combat mission, the bridgelayer needed the help of another vehicle capable of raising the ramps to the transport position.
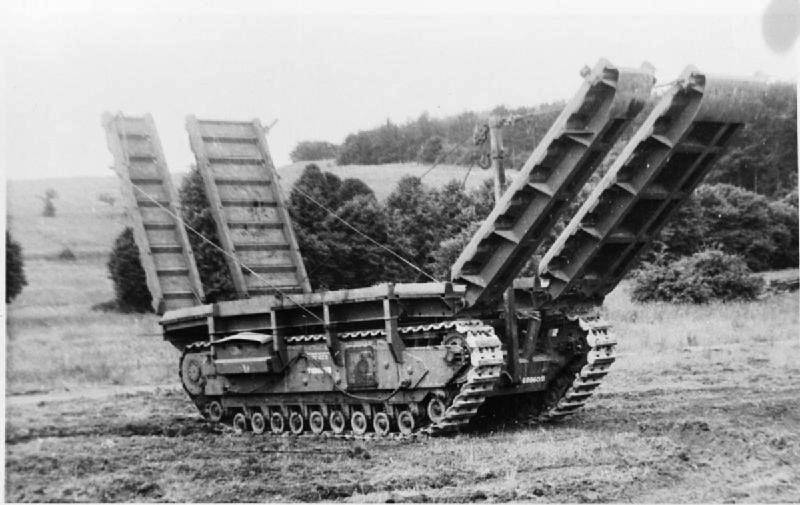
Tank-bridge "Churchill" Ark Mk II
In the same 1944, a version of the bridge called the Great Eastern Tank Ramp was developed on the basis of Churchill. It was equipped with two ramps: one 8,2 m long, the other 7,6 m. This was supposed to help overcome higher obstacles than conventional ARKs could force.
In 1945, 10 cars were built, but they did not get into the war.
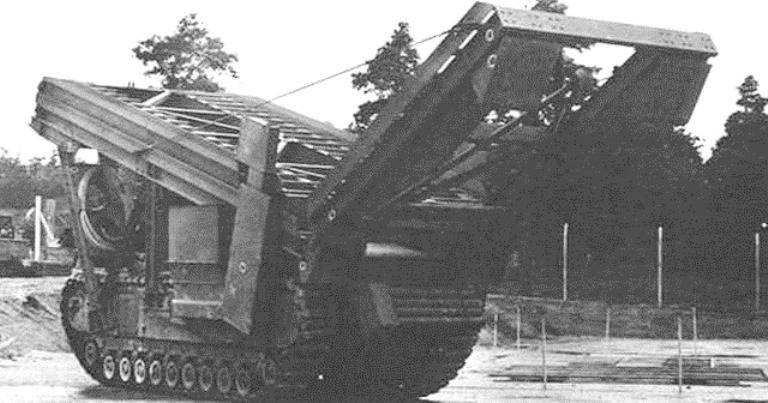
Great Eastern Tank Ramp bridge during trials
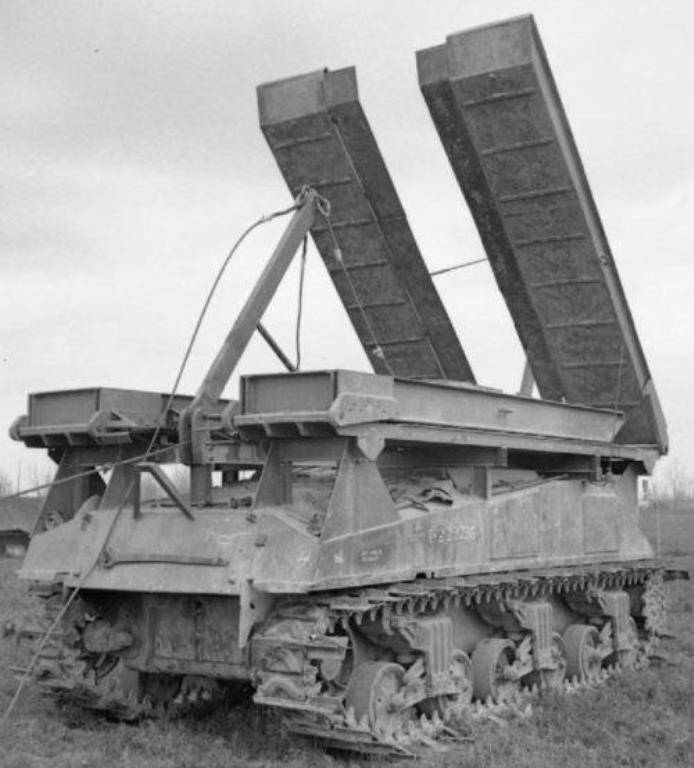
In April 1945, the ARK assault bridge was deployed on the Sherman tank and was named the Sherman Twaby ARK.
This was the last of the variants of the assault bridge developed during the war.
Two track sections were installed on the roof of the hull, and hinged ramps were installed in the front and rear. The bridge covered an obstacle up to 15 m wide or up to 4,5 m high. In the stowed position, the ramps were held by means of the central struts of the Churchill Ark Mk II type. In this case, the rear ramps were laid horizontally above the central track sections, and the front ones were installed at an angle.
Like the previous version, these bridges to the war were also late.
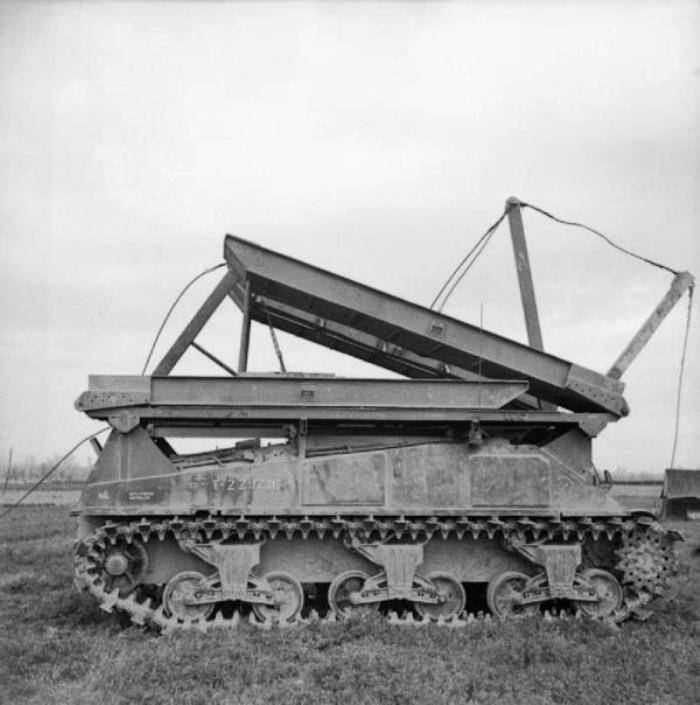
Sherman Twaby Ark bridging vehicle with ramps in the stowed position, April 4, 1945
Sherman Twaby ARK bridgelayer in working opening
As a conclusion - a short video about special vehicles developed for the day of the landing in Normandy.
The ending should ...
Information