How should we sail down the Nile?
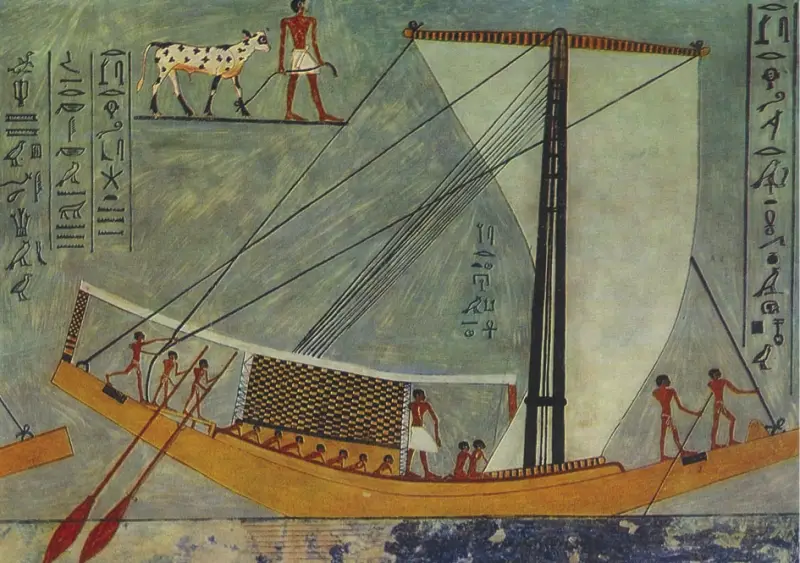
Nile ship of the ancient Egyptians. Wall painting
Greetings, O Nile!
who reveals himself above this earth,
and came to give life to Egypt!
Mysterious is your appearance from the darkness,
on this day when it is celebrated!
Watering the gardens created by Ra
to feed all the livestock,
you feed the earth, inexhaustible!Ancient Egyptian hymn to the Nile
who reveals himself above this earth,
and came to give life to Egypt!
Mysterious is your appearance from the darkness,
on this day when it is celebrated!
Watering the gardens created by Ra
to feed all the livestock,
you feed the earth, inexhaustible!Ancient Egyptian hymn to the Nile
History with their own hands. Today we are starting a new cycle, which will be a logical continuation of the “expedition to the ancestors” cycle. Only in his articles the main attention is paid to the migrations of ancient peoples and the interpenetration of cultures, while history with one’s own hands will be devoted to the creative component of studying the past - the production of various layouts and models of material culture samples of the Ancient World and the Middle Ages.
The fact is that experience shows: at the next stage of development of our society, our children are no longer satisfied with visual pictures on the screens of mobile phones. We ate our fill, although not all of them, of course. Teachers of grades 5-6 from several schools told me that children look with great interest at models of the Cheops pyramid, knights' castles, ancient Greek temples, and not only look at them, but try to make them themselves. There is a lot for this on the Internet, but... As a rule, everything offered is quite expensive and complicated.
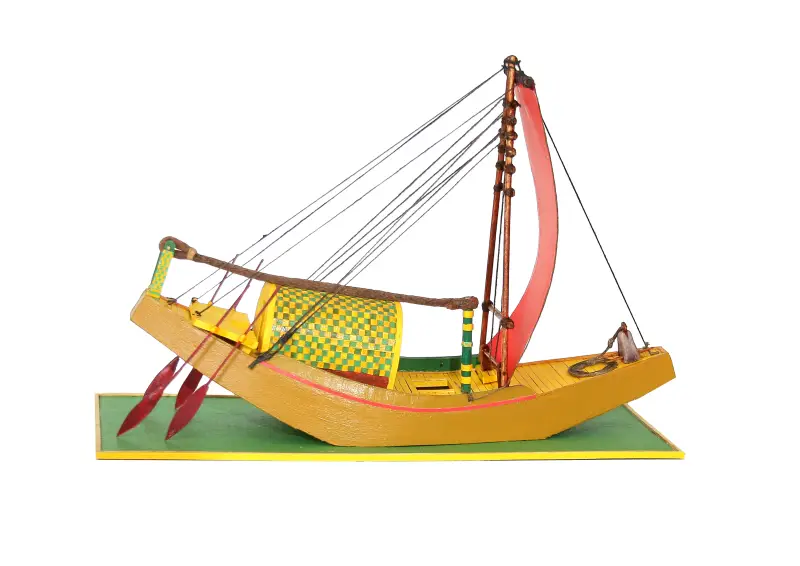
A model of this Nile ship, made from the simplest materials available to everyone. Reproduces the image of a ship from a wall painting
And as a result, many teachers have already asked me to develop such interesting historical homemade products, starting, perhaps, with the cave of a primitive man and ending with... breech-loading cannons, participants in the Hundred Years War and the voyage of Christopher Columbus.
It is curious that in Soviet times several manual books for teachers were published, telling about the production of visual aids for history lessons. But for some reason then, for some reason, all the developments of that time required hard (in the literal sense of the word) manual labor. It was necessary to saw, plan, and what kind of teacher (we must not forget that it is mostly women who work as teachers in our country) would “saw and hammer.” There was no high-quality glue or paints; as a result, even the homemade products that schools tried to make turned out to be rough and ugly, and did not arouse interest among children.
I remember well that, while studying at a pedagogical institute, I carefully read such a book, became acquainted with its developments, drawings and recommendations, and in the end... did nothing based on it.
Working as a teacher in a rural school, together with the children I made a model of a ram and a catapult, and that was all, again, due to the lack of materials. In the 80s of the last century, collaborating with the editors of the magazine “Family and School”, for its back cover I made color scans of historical ships from thicker paper: a Hanseatic cogg, a ship of Ancient Crete and a Viking ship. And for the magazine “Lefty”, already in the 90s, the development of a Chinese junk, a fighting French cogg, a Venetian galleas - in short, thus gained some experience in working with paper and cardboard. Some of these developments were also included in three of my books published in 1987–1990. publishing houses "Polymya" and "Prosveshcheniye".
For three years he worked at Penza school No. 47 on a voluntary basis. Taught creativity lessons in the class where my granddaughter studied. And what didn’t we do there?! And a castle made from toilet paper tubes, and a model of the Brazilian jangada raft, and an Indian canoe... In a word, my children never got bored, and the school classrooms were replenished with a cutaway model of an active volcano, an Egyptian pyramid and a Greek temple. Moreover, it is important that right now, children’s interest in all these homemade products has grown significantly, which is noted by many practicing teachers.
So, why don’t we spend our leisure time together with our children, including our grandchildren, working on various antique handicrafts? They can easily become an excellent toy and... a gift (and more than one!) to their home school.
The very first and perhaps the simplest development could be an Indian canoe made of birch bark, but now it’s winter, and I’m somehow reluctant to go into the snow-covered forest for bark. In addition, we are now getting acquainted with the cultures of Ancient Egypt and the ships on which the Egyptians sailed along the Nile and even dared to plow the oceans. So today we will try to make a model of an Egyptian river vessel. It is made in a somewhat conventional “school” manner, however, done carefully, it looks very good, which is easy to see by looking at its photographs.
The Egyptians originally built their ships from bundles of papyrus, which is why the hulls of many models of these ships found by archaeologists in the tomb of Tutankhamun and Maketra are painted green. Their bow and stern were bent upward and often tied with a rope, which was additionally twisted using sticks inserted into them. These ships did not have a rudder. Instead, steering oars were used: either one large one at the stern, or four to six along the sides, again, in the stern. The sails were both narrow, vertical, and very wide - horizontal. The mast was often made folding.
Please note that the Nile ship model is glued to a base that simulates Nile water. Plus, it’s easier to use in class.
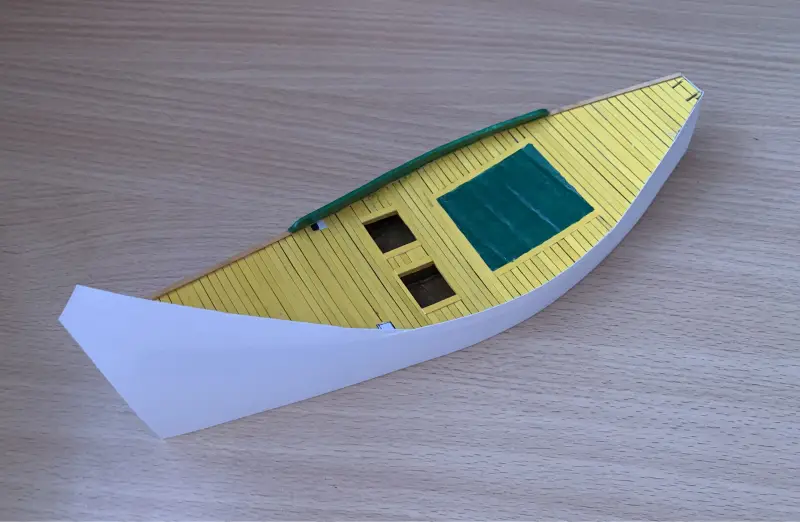
A wall depiction of one such Nile ship with an A-shaped mast has reached us. As you can see, the ship is shown with a hull that is immersed in water, and this is the most interesting way to demonstrate a model of this ship by gluing its finished model onto a background of green paper that imitates the greenish Nile water.
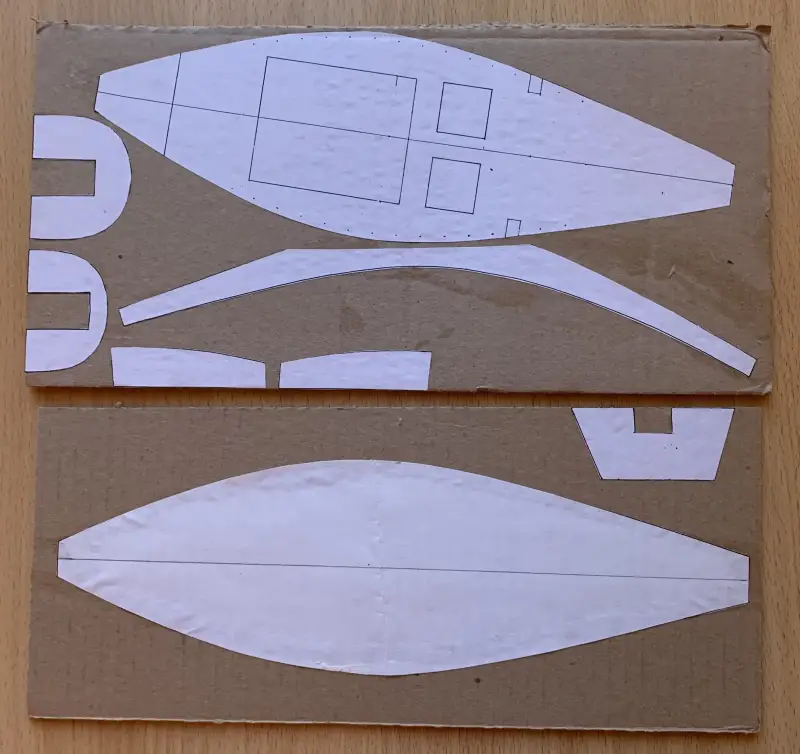
Photo of scans glued to packaging cardboard. Two squares on the deck will need to be cut out - these are hatches leading into the hold
So: model development is very simple. You can simply print them out from your computer screen, and then cut them out and glue them with PVA glue onto brown packaging cardboard, which you can always get at any modern grocery store.
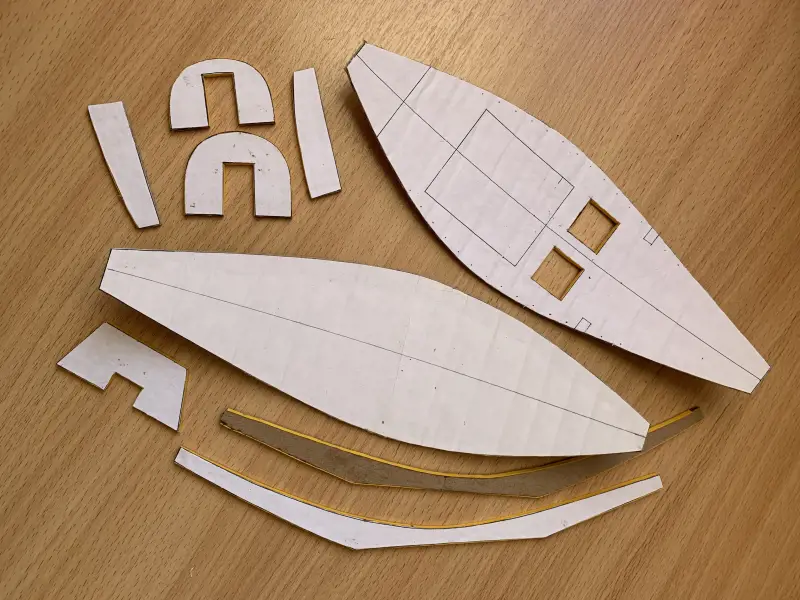
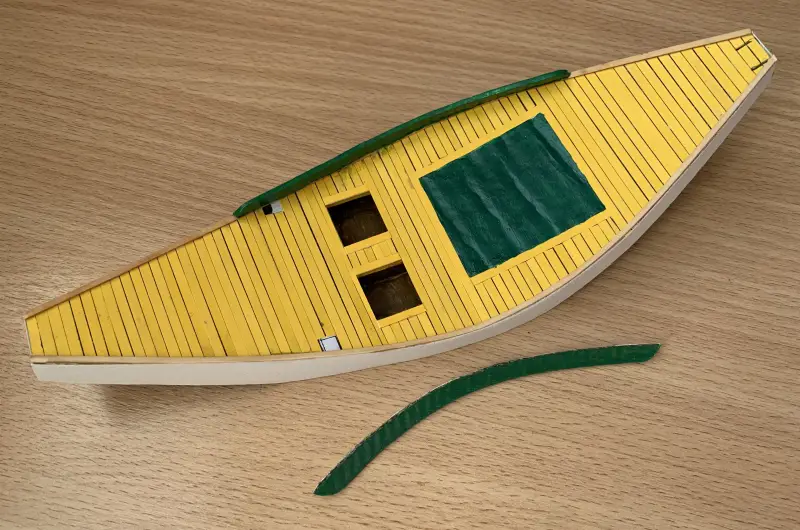
In this photo the scans have already been cut out. Side parts with the profile of the ship need two pieces!
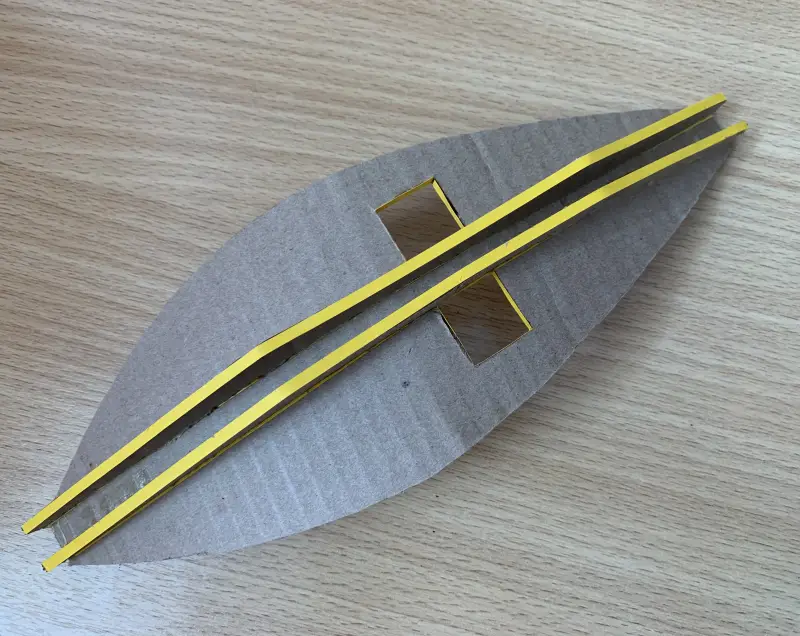
The deck is bent along the profile of one of the side developments, after which they are glued to it from the inside. This increases the rigidity of the body
Accordingly, the bottom is glued to them from below. This is what the hull of a ship looks like without side plating
The deck of the Nile ship was made of planks. To avoid the hassle of cutting them, the easiest way is to buy a set of strips of yellow scrapbooking paper and stick them onto a deck that has previously been painted black, so that the seams between the boards are just a little noticeable. This visually greatly decorates the model!
The deck hut is glued together from four parts: the front and back walls and two strong cardboard sides. But you will have to work hard on its tire. Scrapbooking strips are too wide for her, even those that are 3mm wide. You will have to independently cut strips 1,5 mm wide from green paper and also stick them on a sheet of yellow paper at intervals of 1,5 mm.
When the resulting striped paper dries, it, again, should be cut into strips 1,5 mm wide. They need to be glued onto white paper from the sketchbook in a checkerboard pattern. And this is exactly how you will end up with such a beautiful chess mat, which you will then need to wrap around the top of the hut, which should stand on the deck.
The platform for the helmsmen is brown cardboard, covered with strips of yellow paper “like boards”.
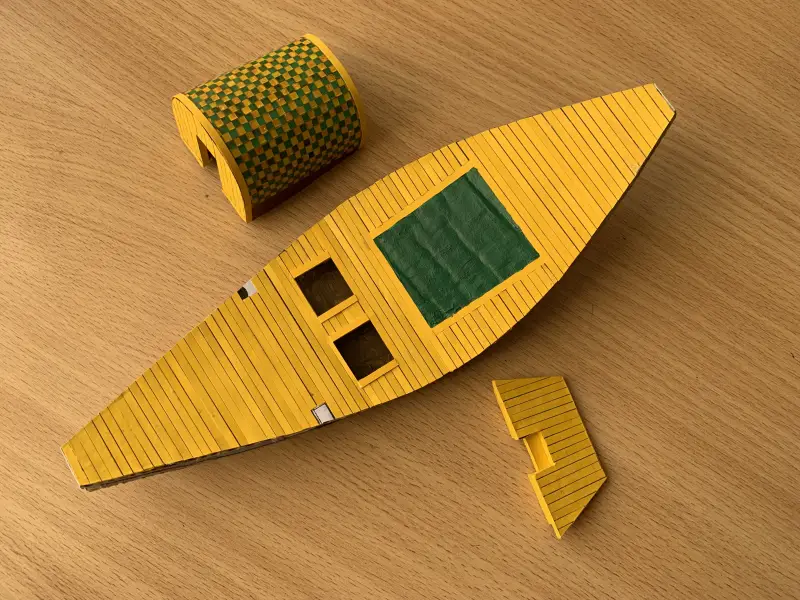
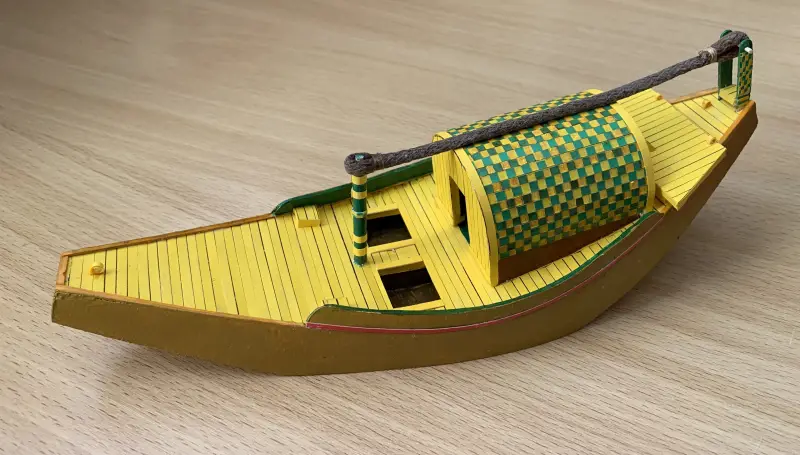
Hut, hull and helmsman's area
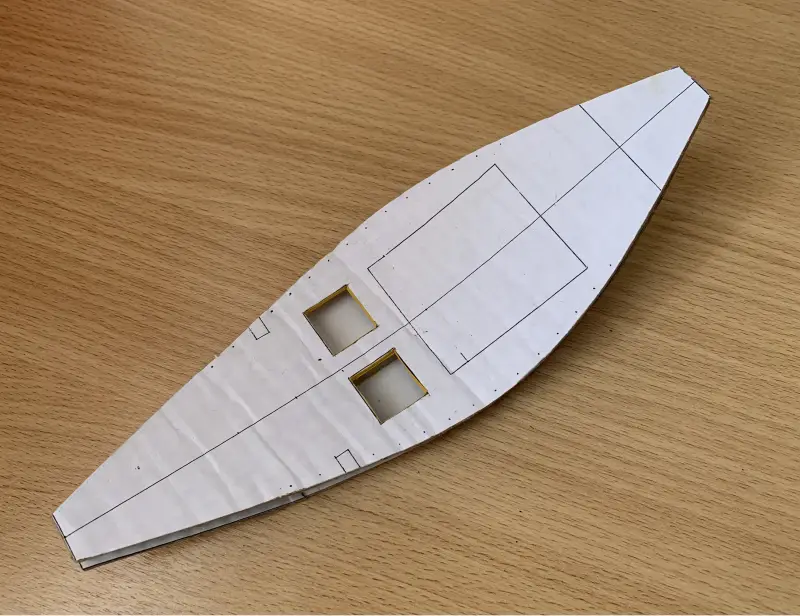
The sheathing is glued onto the sides coated with glue, first on one side, then on the other. Simply take a sheet of thick paper and apply it to the glue-coated ends of the deck and bottom. It is best to use the “Moment” gauge for this purpose. Excess paper is then trimmed with scissors
The sides on this model are cut out separately and glued onto it after it receives the side trim
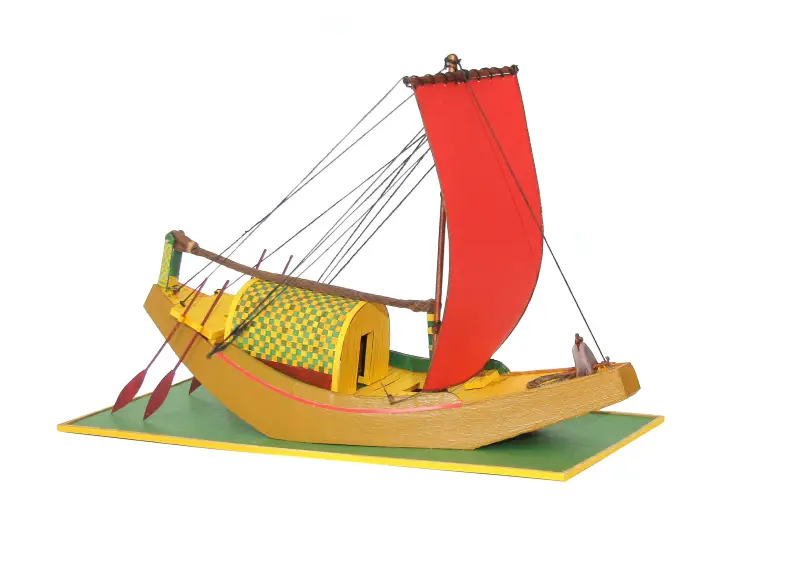
The finished hull is painted yellow ocher (this is exactly the color of the hull of the ship on the wall painting). They glue the hut onto the deck, install supports for the rope (woven from cotton yarn!), supports for the mast, and glue paper rings for fastening the ropes, which can be replaced with screw-in self-tapping screws with a loop at the end. They are usually sold in Leonardo stores.
The body of our model has simplified, “chopped” rather than rounded contours. However, for children studying the history of Ancient Egypt in the 5th grade, this form of case is quite sufficient
The A-shaped mast is assembled from kebab sticks or sets of wooden slats for making models of wooden buildings - we now produce both slats with a diameter of 3 mm, and the models themselves in scales 1:72 and 1:35, so order and buy all this today no problem. For beauty and strength, all the mast crossbars are tied with threads, which are coated with PVA glue.
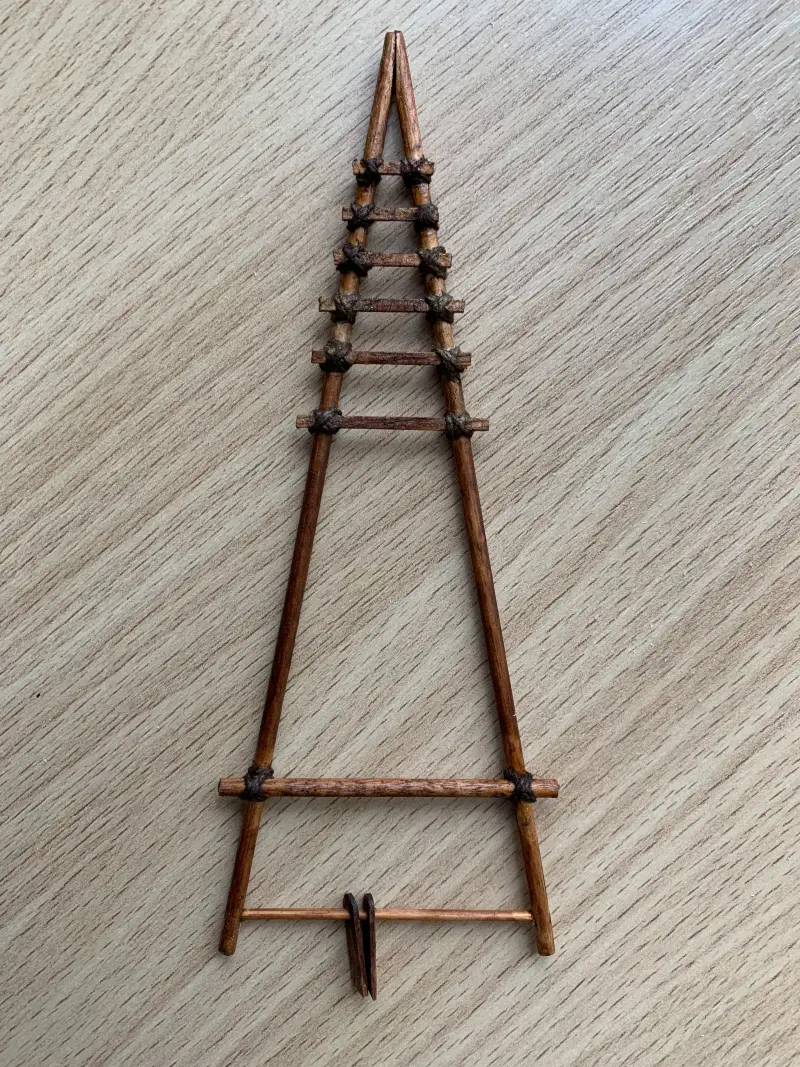
This is the mast. On the lower beam two fastenings are visible, thanks to which the mast can be lowered and raised. It is best to glue them to two steps along the sides (see photo) using “Superglue”
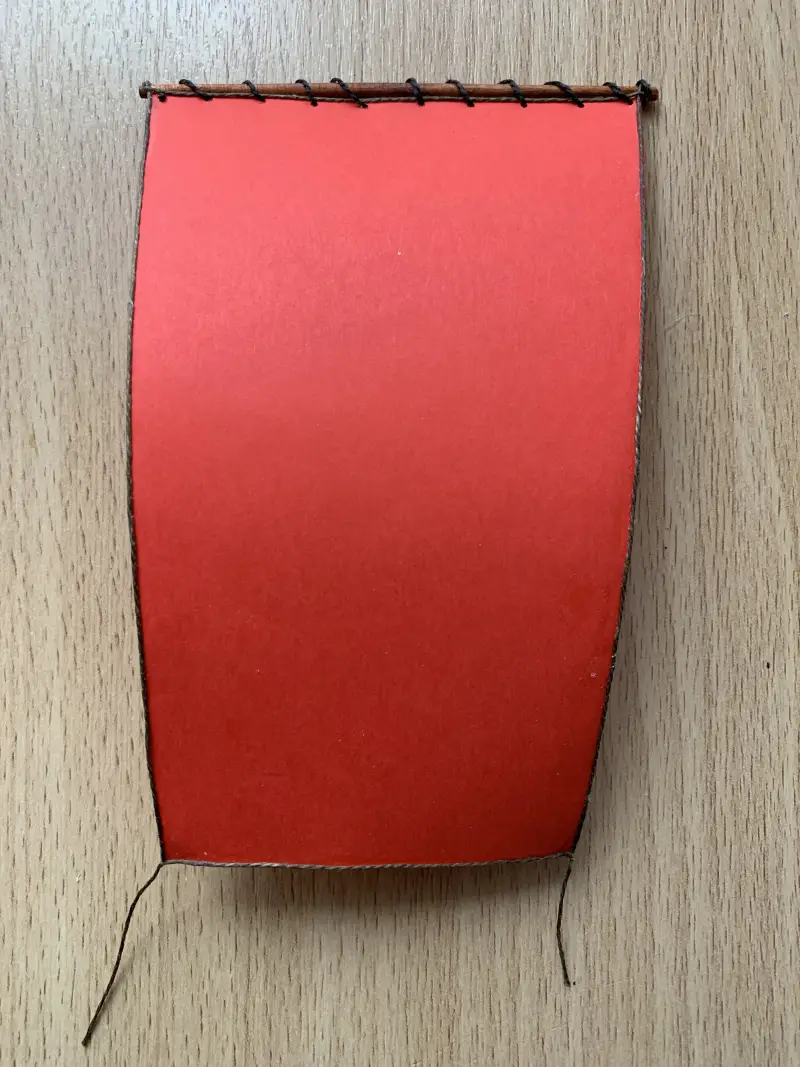
A sail made of red paper: I thought it was more beautiful...
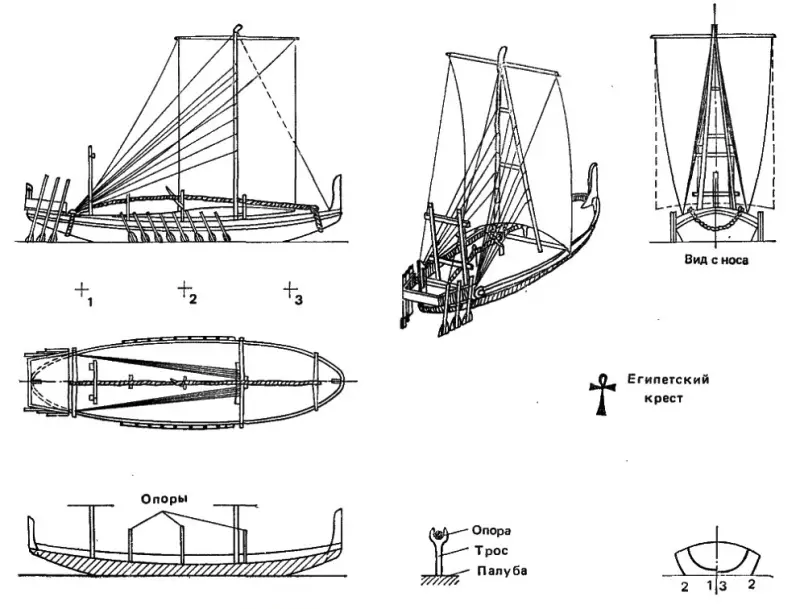
The model of the Nile ship can be made somewhat differently, focusing on this simple drawing. Experience shows that it will be quite sufficient for such a school model.
All that remains is to stretch the rigging from black threads, glue steering oars made of thick paper and copper or steel wire to the platform and place an anchor on the bow of the vessel.
The original anchor was made of a flat, conical stone with two holes for stakes sharpened on both sides. The easiest way to make it is from... washing gum, into which you should stick toothpicks instead of stakes and then paint your anchor a stone color.
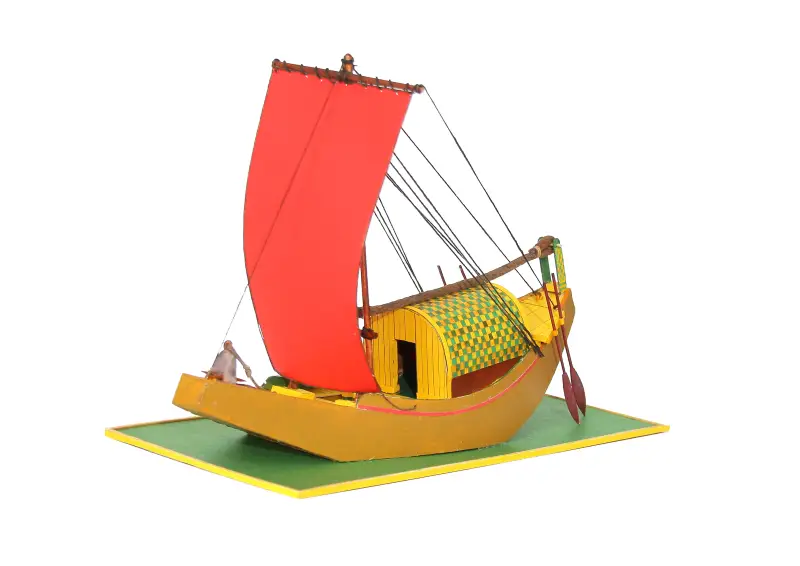
As a result, you should end up with a model like this:
In principle, it can not only stand on a stand, but also float. To do this, you just need to leave it with a rounded bottom and cover it with any waterproof varnish!
PS
Photographs by the author are used as illustrations.
A continuation will follow, however, it will not appear very soon...
Information