"So that everyone understands their maneuver" - tips for the summer
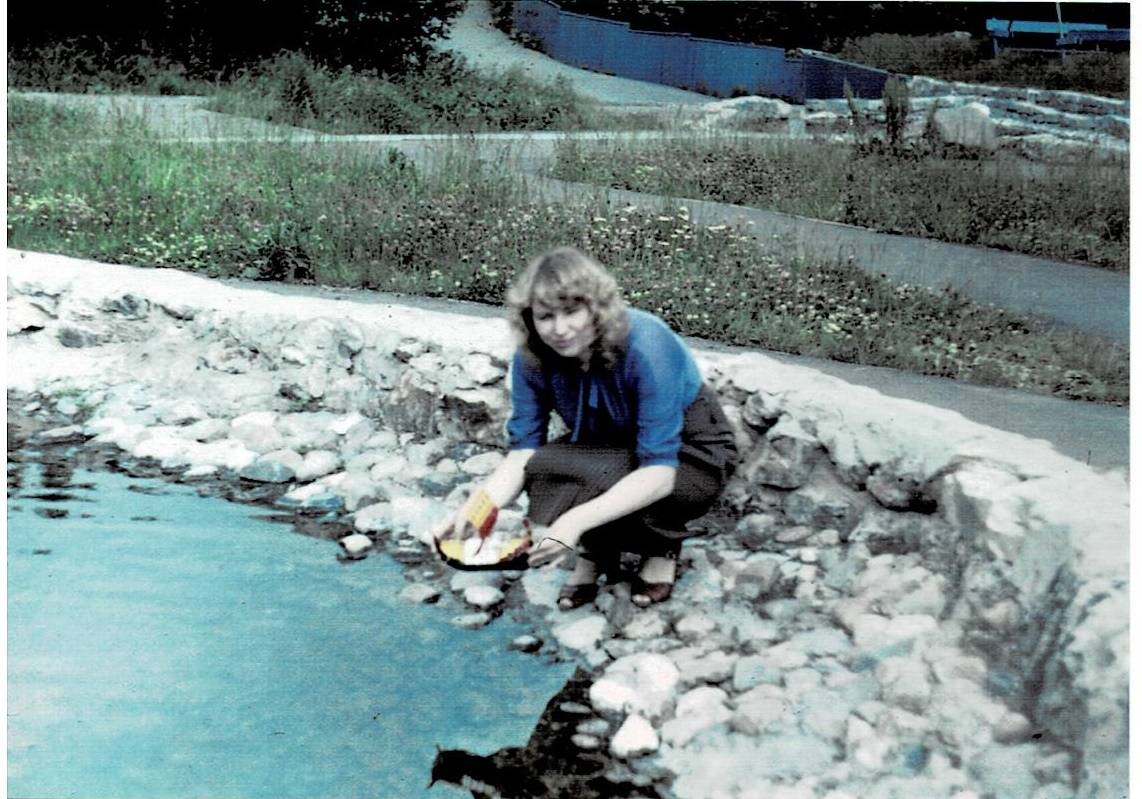
"Prepare for launching an ancient Slavic paper boat!" 1984 ponds in the area of the park. Belinsky in Penza. Very old photo by the author
“There are many things to do around
Skillful hands
You just need not to be lazy
There are paints and crayons
Glue and ember
You just need to learn. "
(Song of the hare Stepashka
from the screensaver of the Soviet television program
50-60s of the twentieth century
"Skillful hands")
Skillful hands
You just need not to be lazy
There are paints and crayons
Glue and ember
You just need to learn. "
(Song of the hare Stepashka
from the screensaver of the Soviet television program
50-60s of the twentieth century
"Skillful hands")
Creativity is around us. What was good about the 60s of the last century was its TV and radio programs for children. "Skillful hands", "One hundred ventures of two friends", "Operation Sirius-2", "Club of famous captains", "In the land of literary heroes", "KOAPP", "Postal stagecoach" - they gave me a lot and even partially determined my destiny.
So, after the program “One Hundred Ventures of Two Friends” I made a camera out of a matchbox and even took pictures of it, and then ... he also appeared in my novel “The Season of Love”. After this cycle, it was already easy enough for me to lead a technical circle in a rural school, and then for ten whole years my television programs on TV in Penza and Kuibyshev. According to which I then wrote three books for the publishing houses "Polymya" (Belarus - at that time it was she) and "Education" in Moscow. They also helped me in raising my own child, which, of course, is especially important.
So this article is just about the fact that we all have summer on our nose. Our children (and grandchildren!) Will go on vacation. And here is just the time with them to do various creative and handicrafts.

The first hosts of the Skillful Hands project were Valentina Leontyeva and Tatyana Grushina, who at that time worked as announcers of the Central Television. To begin with, they had to learn to work with papier-mâché and paper ...
And then I once read a comment of one VO reader:
"Now my child will be five years old - I will deal with him!"
So at five years old it will be too late. Before it is necessary! Give the child pieces of wood, stones, so that his fingertips touch not only fur and plastic, because at the same time signals from the receptors that are located on them go directly to the brain and develop it.
Already at 2-3 years old with a child, you need to sculpt, cut out funny figures with scissors, and glue applications. Five years is already a time for quite serious homemade products. The child should use scissors, a knife (model!), Draw with a ruler, work with glue.
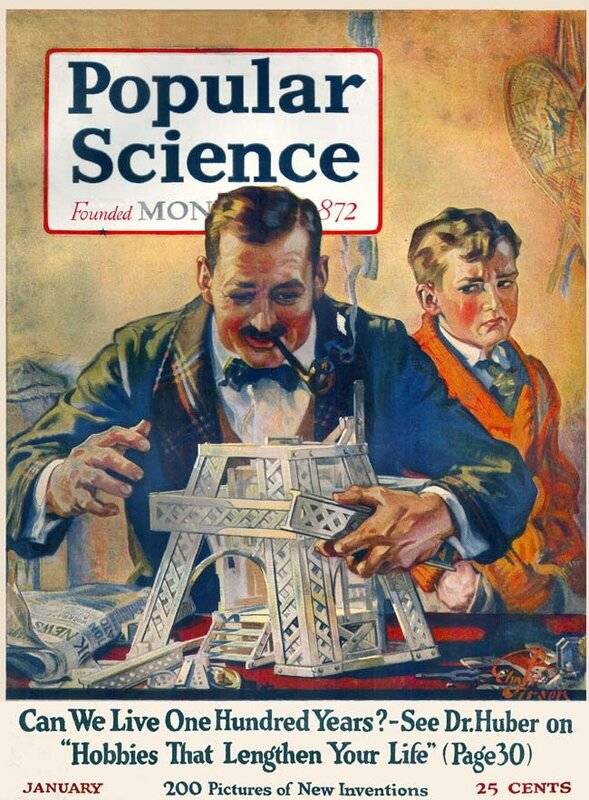
If you do not work on the child from the cradle, then it will be like on the cover of this magazine. The problem, as you can see, is very old!
But the most important thing is to show the child how to work with this or that instrument, that is, to work in front of him. The son will not respect his father, no matter how much money he brings to the family and tells how he works in his production, because he simply cannot imagine this. But he will respect both his father and grandfather, who made him a flying airplane, a cardboard car or a tank, which none of the neighboring boys has, or launched a boat with him on the stream.
So remember again that it's time to do all this ahead!
It is also important that by developing a child's hands, it is possible and necessary to develop his intellect at the same time. Well, as for how to combine both, you will just read now ... So ...
Floating homemade products
In summer, reeds grow on lakes and swamps. And many, including the guys, love to collect it and put it in vases. Then, however, its inflorescences turn into fluff, and they have to be thrown away. But you can benefit from them even before that. So, on the VO website there was an article about the "Nonparelle" (Incomparable) raft, on which three Americans crossed the Atlantic back in the XNUMXth century. You can tell your son about this. And the girl can also be interested in it. And, being on vacation where the reeds grow, offer them to make a model of such a raft. By the way, if they are schoolchildren, then in the fall at school they will definitely require homemade products "from natural materials." And here she is - already ready!
Look at the diagram of making a model of the raft "Nonparelle". Everything is so simple there that there is nothing special to describe. Materials: stirring sticks for coffee (this is generally a unique model material!), Sticks-spatulas for ice cream and bamboo skewers for barbecue. Well, there is also thick paper and harsh threads.
We will make "cigars" for the raft out of reeds! You just need to paint them, and take care of the paint in advance. It should be gray nitro enamel mixed with chalk or cement, and thick enough. It is ideal to paint like this: a pin is stuck into the "reed", after which it is lowered into a paper tube with a carefully sealed bottom and on a solid stand, half filled with paint. Excess paint will have to drain, and the "cigar" itself can be hung to dry in the sun. Three cigars can be made this way in just a few minutes. Moreover, a child can do such painting!

The scheme of manufacturing the model of the raft "Nonparelle"
While they are drying, you need to make masts with sails, a tent, deck flooring. All this should be glued either with PVA glue, or (with your help and with gloves) "Superglue". As soon as the cigars are dry, the flooring is fixed on them, the masts, the bowsprit are installed (you can simply stick them in, smearing the tips with glue). And your raft is ready. Believe that such "fuss" will bring you closer to your child, like nothing else. And he will remember this all his life.
It's even easier to make a Polynesian pie, you don't need to paint anything there. The frame is tied up from barbecue sticks and spacers are made from them. The sequence is as follows: first the mast with struts, then the longitudinal frame of the pies. Glue with "Superglue" and tie with threads for strength.
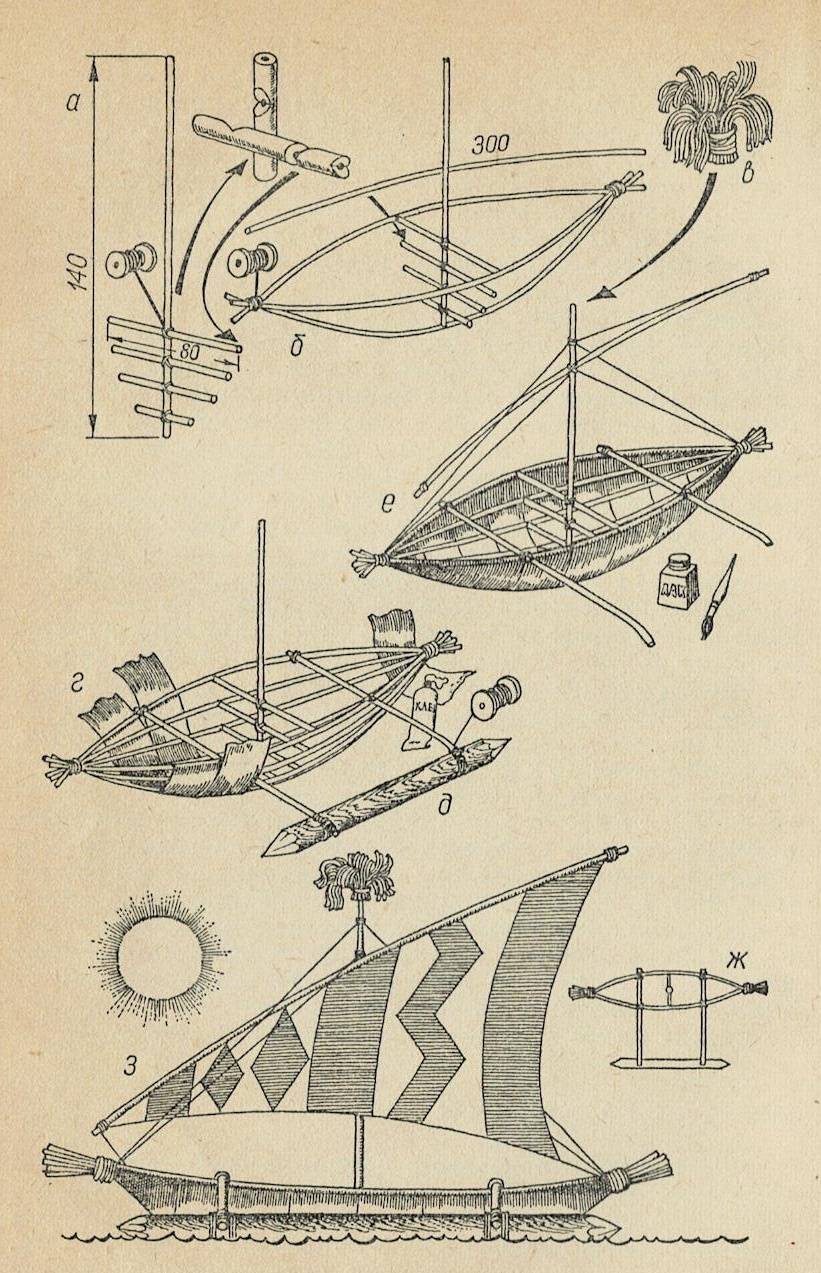
Polynesian Pie Catamaran
When the skeleton of the heads, it must be pasted over with strips of brown sticky film, bending its ends into the body. It is clear that there should not be any gaps in it. How to make a balancer is clear from the picture. But the paper sail does not need to be painted, but decorated with an applique. It turns out very nicely. And usually these sails are very popular with elementary school teachers! A bunch of colored thread at the top of the mast will complete the picture!
Models of old ships from ... paper tube
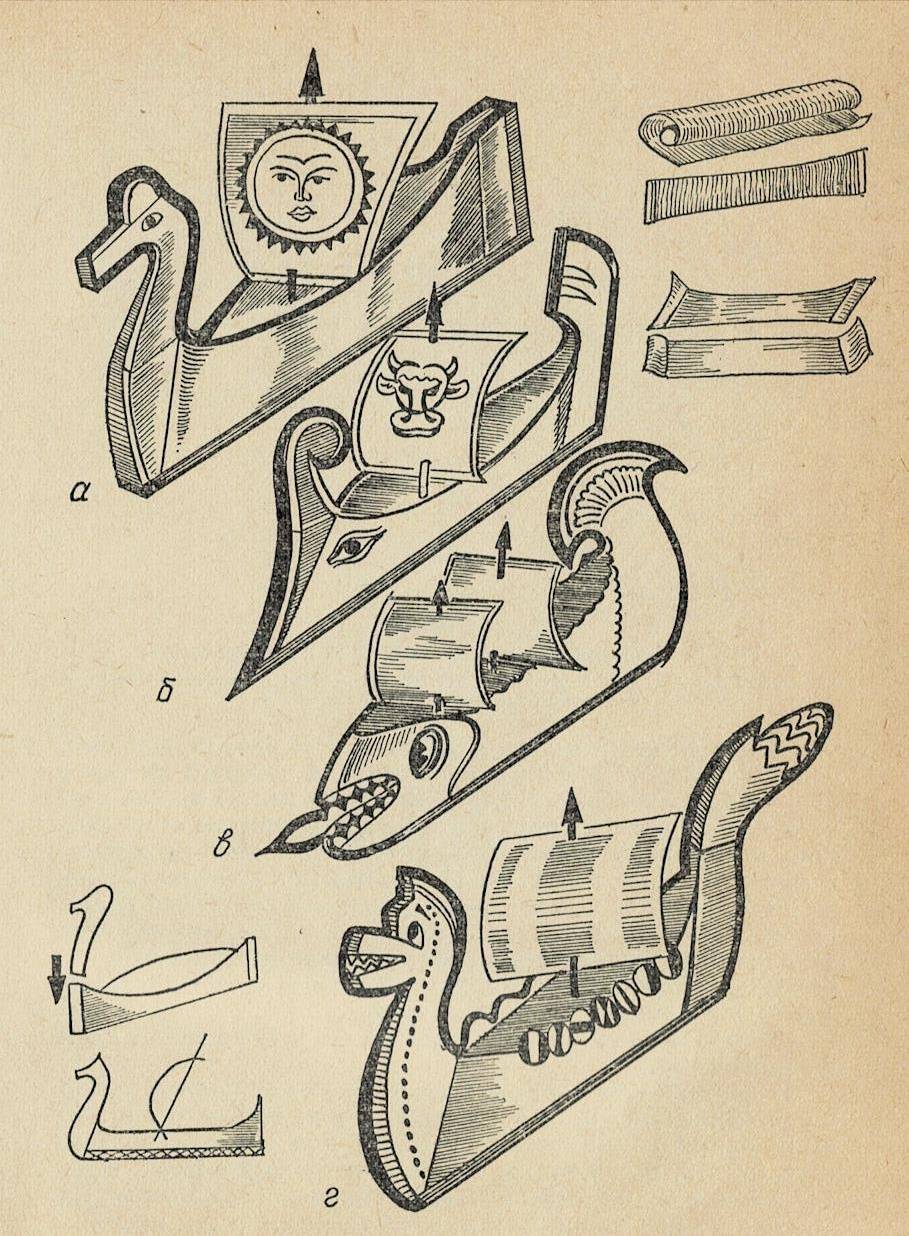
For preschoolers and first graders, there is a development from 1900 from the magazine "Niva". It turns out that the easiest way to make a model of an old ship with a deck loss is from an ordinary sheet of A4 thick paper.
We roll up the tube, glue the ends into two parallel planes. Then, on one side, we mince the tube and pinch the edges in the same way as it is done for pies. The ends are trimmed and reinforced with cardboard overlays. In the center, a mast is installed with a sail impaled on it. And… that's it!
True, there is a trick. Ballast must be put inside the case. For example, lead shot. And pour molten paraffin. Before that, the body must be painted with nitro paint or nitro varnish. But in the deck, a hatch should be cut for this, and then it should be glued. You can simply put plasticine on the bottom and press a couple of fishing weights into it.
It has been checked: children of 1–2 grades can use this technology to make a model of a Slavic boat, an Indian canoe or a Viking ship in one lesson, after which you can go with them to launch these boats on a stream. The hatch with a model knife, however, will have to be cut through by an adult. Also, it will be necessary to paint the case with nitro enamel from a spray can on the street. But on the other hand, the sail, and the shields, and the yellow deck lined for the boards - all this is done by the children themselves.
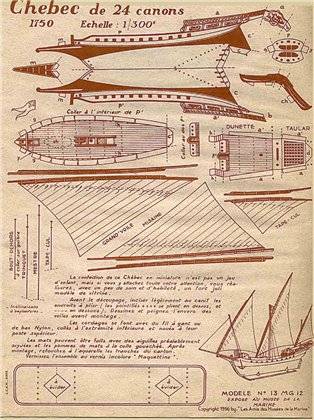
Shebeki model from paper scan
But this model of a shebeki is not my development. But I did this model in much the same way. And she looked very beautiful on the water.
By the way, you can create in the classroom a whole museum of ships of all countries and continents, and instruct the children to tell about the model they made! Very informative and interesting!
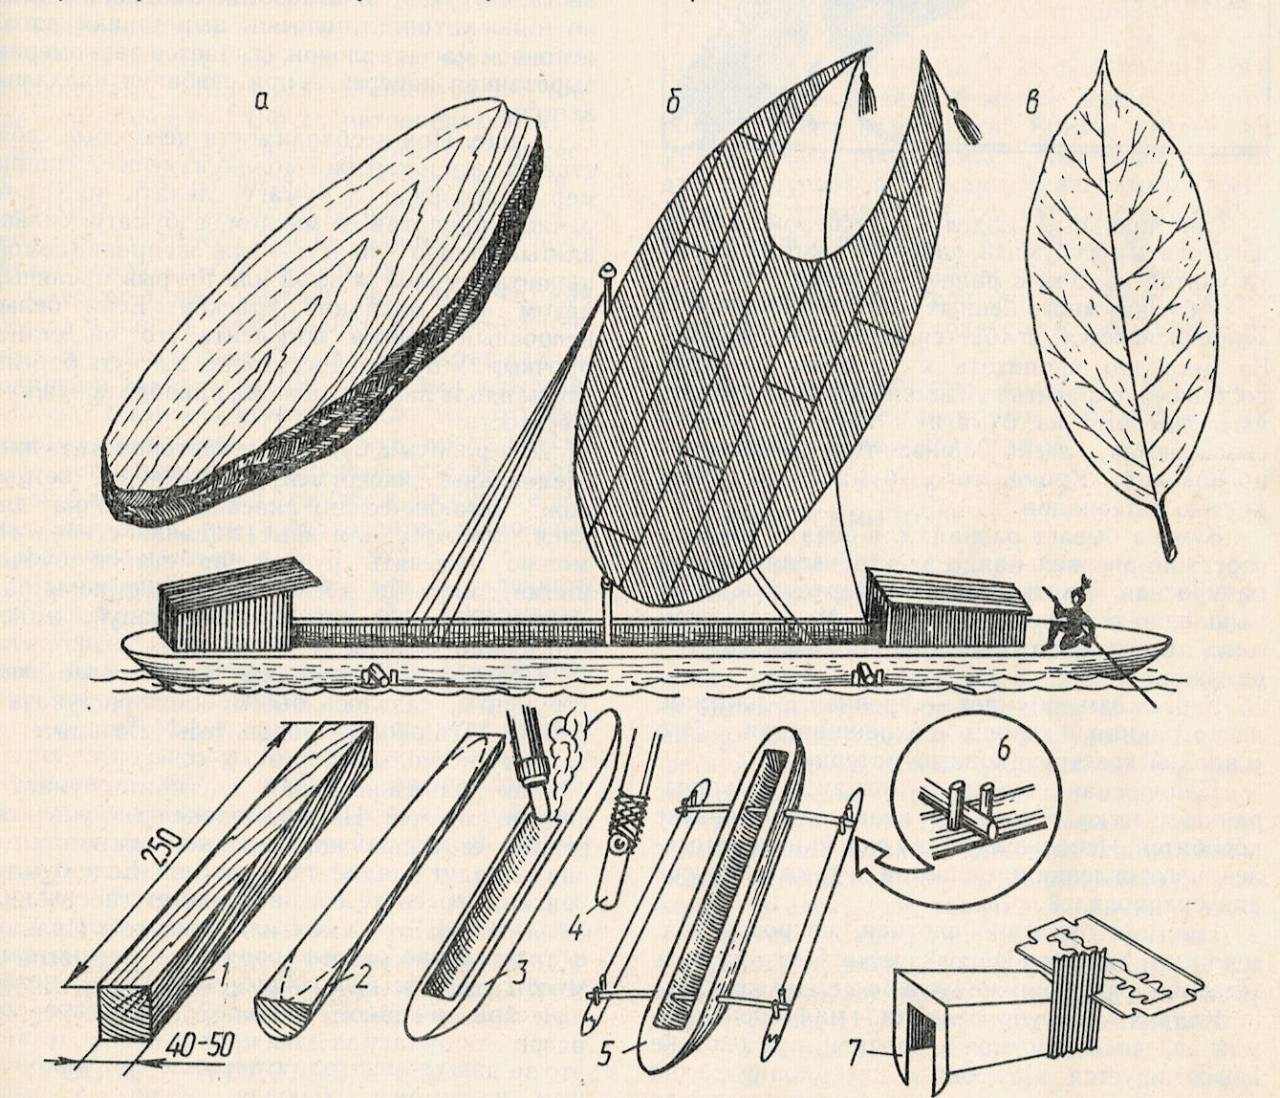
Pine bark pie with ficus leaf sail
Again, you went with your son or grandson to the forest. And there last year's bark falls off from the pines. Children have always carved boats from the bark. But making a cake like this is much more interesting.
Outside, the body is cut out with a knife and sanded with sandpaper. But inside the bark is selected with an electric burner and a chisel from a sharpened student's pen for an insert pen. Naturally, it is necessary to burn out on the street in windy weather. And if, say, you do it at the dacha, then ... be sure to use a fan, so as not to breathe fetid smoke.
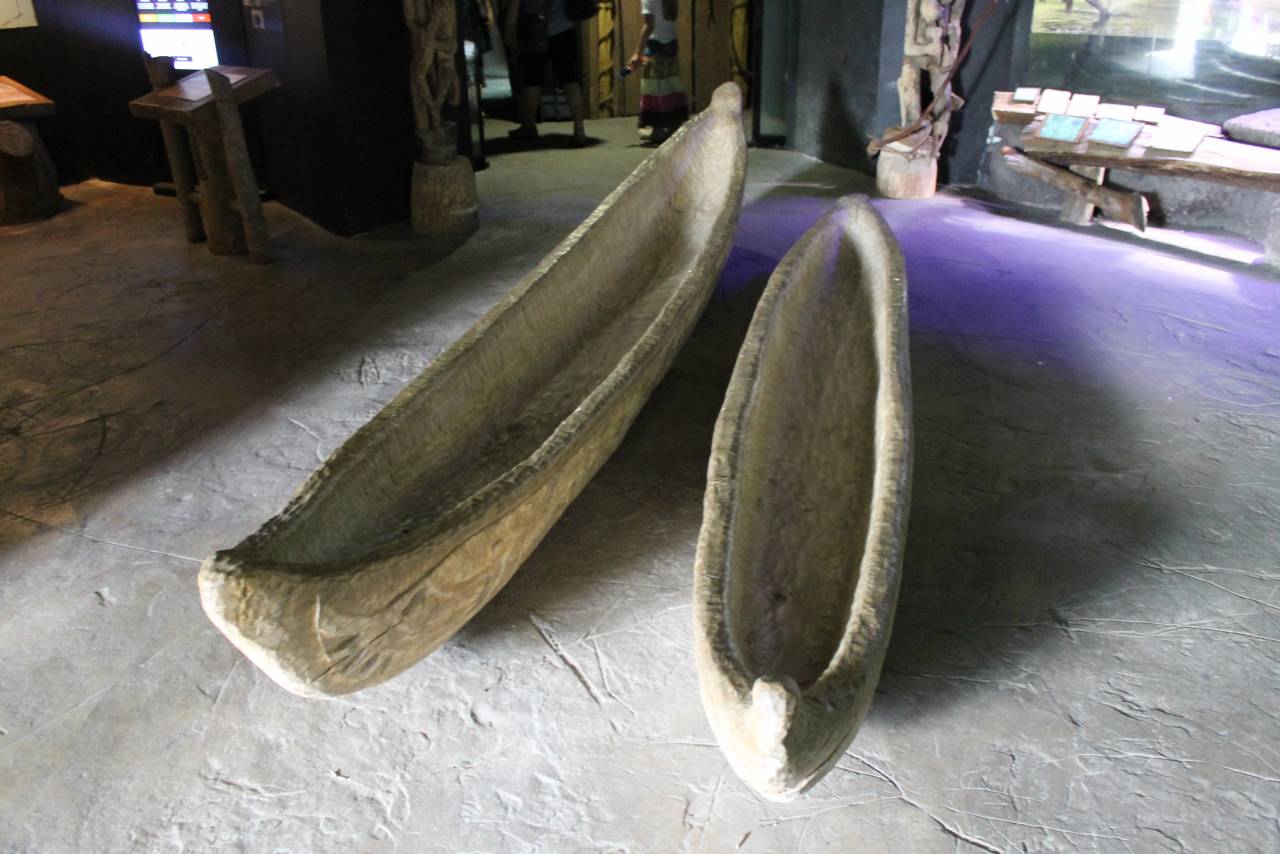
By the way, this is how ancient and backward peoples hammered their pies. Pies from the collection of the Prague Zoo. Photo by the author
A very beautiful sail for this pie can be made like this: bend its shape out of a soft wire (copper) and glue it with superglue on ... a leaf of ficus dried between several newspapers. You can start drying the sheet now. How will it dry out so as not to become brittle? We need to coat it with PVA glue!
Does your child love travel and travel stories? Tell him about Thor Heyerdahl and offer to make a tabletop model of his papyrus ship Ra. Material - "plastic" curable during cooking or in the oven. All wooden structures - barbecue sticks, matches, stirring sticks. Here, however, it all depends on the scale. But you can create a whole collection this way. historical ships, and the collection is completely unique! And instill in your child this hobby for life!
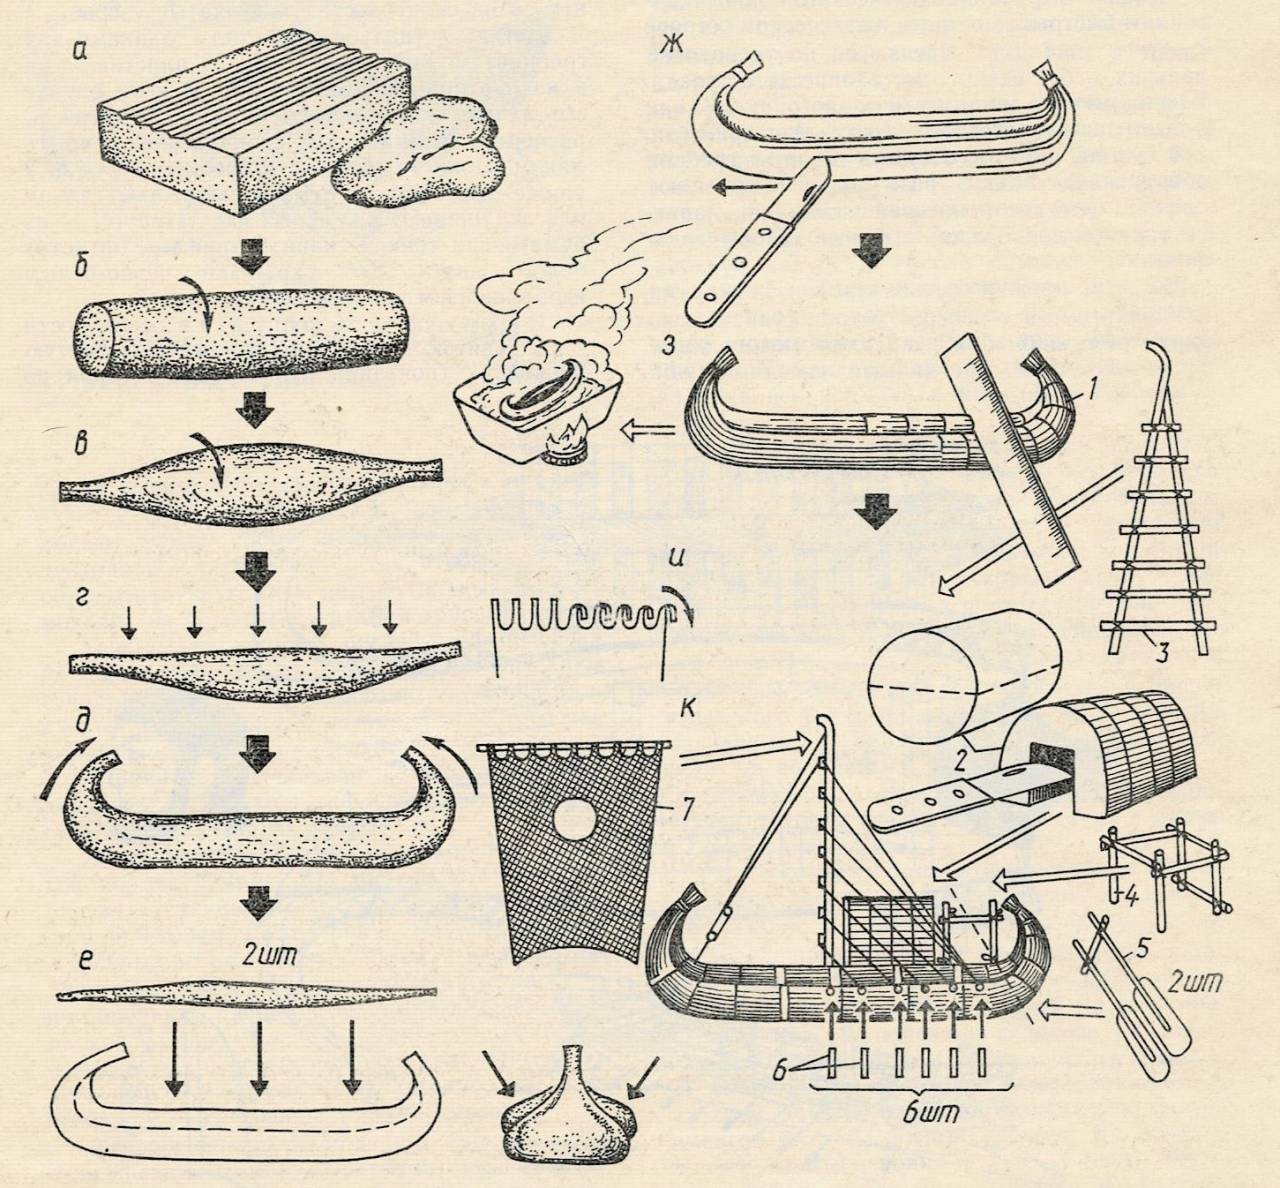
Bench model of the vessel "Ra" made of plastic
True, not all children like bench models. Many demand from the Pope that the boat floated. Well, you can also make it swim.
For example, this catamaran-airship. The whole model is made of thick paper and cardboard. Therefore, it is record-breaking lightweight. Painted with nitro enamel and therefore gets wet. The propeller is two water wheels, which are driven by the wind. Therefore, this model should be launched in strong wind and downwind, then it develops a very decent speed. The pond is not very large - an ideal place to test these "Windwalkers".
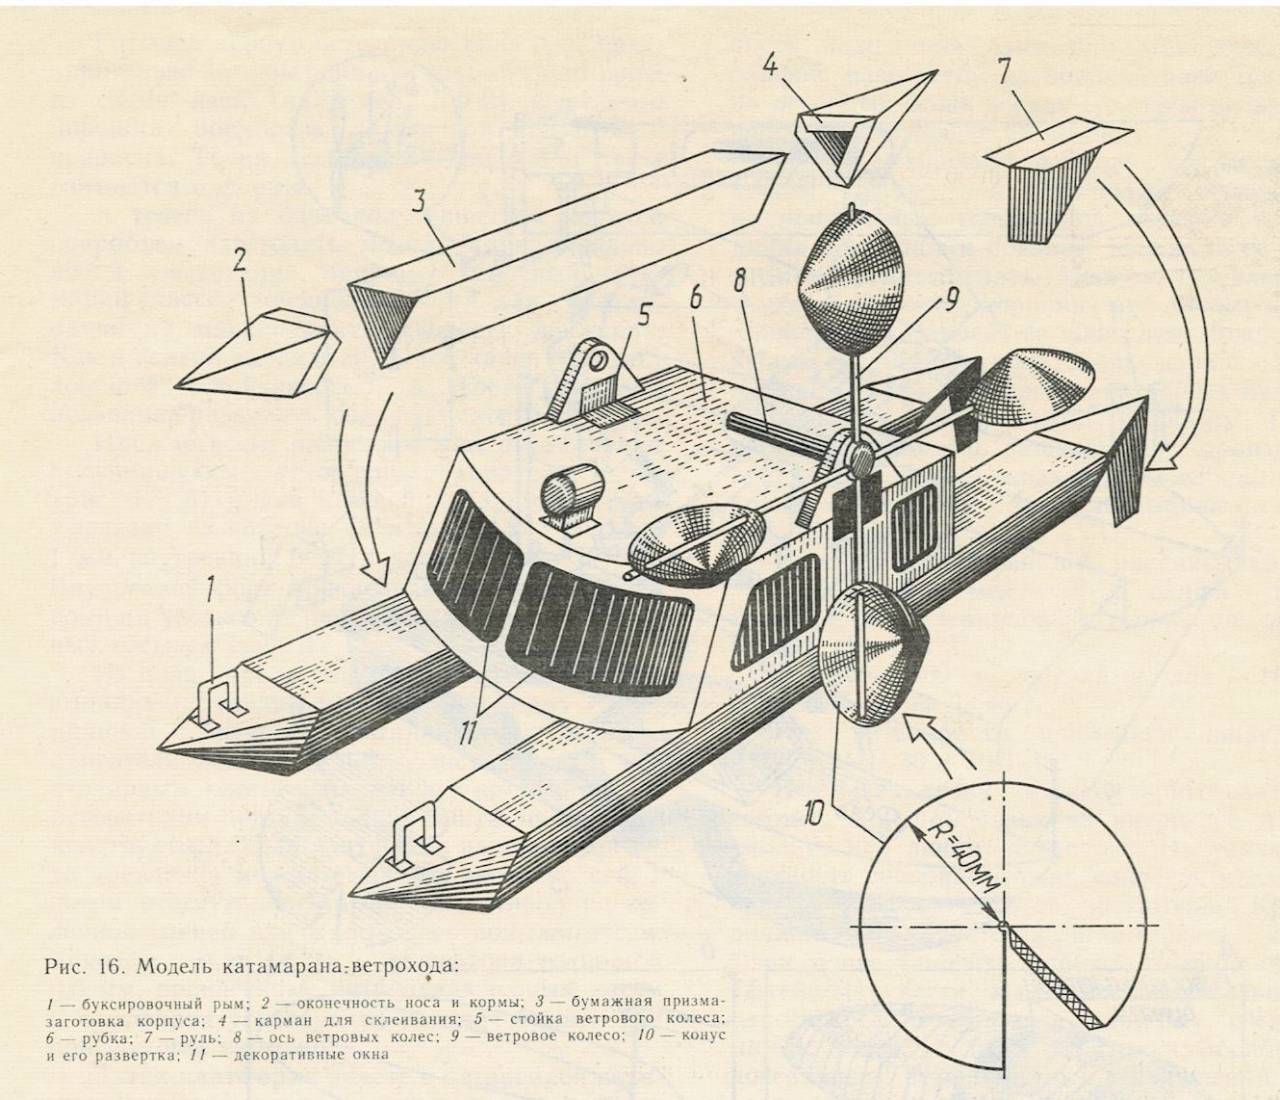
Aircraft paper catamaran
Even more interesting, albeit more complicated, is the model of aero-rover with a microelectric engine. Here you cannot do without polystyrene 3 mm thick, but you can buy it now. The dimensions of the model are determined by the dimensions of 17 parts (caissons) - from plastic packaging for sour cream and other food products. The bottom of the case 1, the pillars of the case 3 and 7, the rear wall of the case 4, the sockets of the batteries 6, the rudder 14 and the supports 16–18 are all made of sheet polystyrene. And these parts are glued together with "model glue". The propeller fairing 15 is a sour cream jar with a cut off bottom.
But case 2 can be made of cardboard. Its function is purely decorative. The propeller is a wooden boss with cuts at 45 degrees, into which blades made of sheet polystyrene 0,5–1 mm thick are glued. Unfortunately, earlier it was possible to write: “Glue the DP-10 micromotor to the bottom of the case”. And everyone understood everything. Now such engines are no longer to be found. But you can certainly order some others and assemble the motor part for them yourself.

Fantastic aerial vehicle on caisson banks
For a child, the most interesting thing in this homemade product is the caissons 17. You can put on lids on them. But you can also remove it. Nevertheless, the aero-vehicle will not sink, and this will not affect its driving performance. But it must be balanced very precisely, for which plasticine with pieces of lead is added to the caissons. On the water, this boat looks like something completely fantastic, especially when painted in the color of brushed aluminum.
If you wish, you can come up with many more such floating homemade products. And make them together with your children. And the benefit from this will be mutual for everyone. The main thing is not to be lazy!
Продолжение следует ...
Information